Wall shelves can add useful storage without consuming floor space, but a shelf in the wrong location quickly becomes clutter or an obstacle. The best time to solve height, spacing, and weight questions is before the first hole is drilled.
This guide focuses on planning. The correct mounting hardware depends on the shelf system, wall construction, load, and manufacturer instructions. When a shelf will carry heavy or valuable items, use hardware and installation methods rated for that job.
Decide what the shelf will hold
A display shelf for lightweight decor has different needs from a shelf holding books, cookware, tools, or small appliances. Estimate the real load, including the shelf itself, and choose a system with a clearly stated capacity when possible.
Measure the usable wall, not just the empty area
Open doors, cabinet doors, windows, and nearby drawers while measuring. Check light switches, outlets, thermostats, vents, and trim. A shelf that technically fits may still interfere with daily movement.
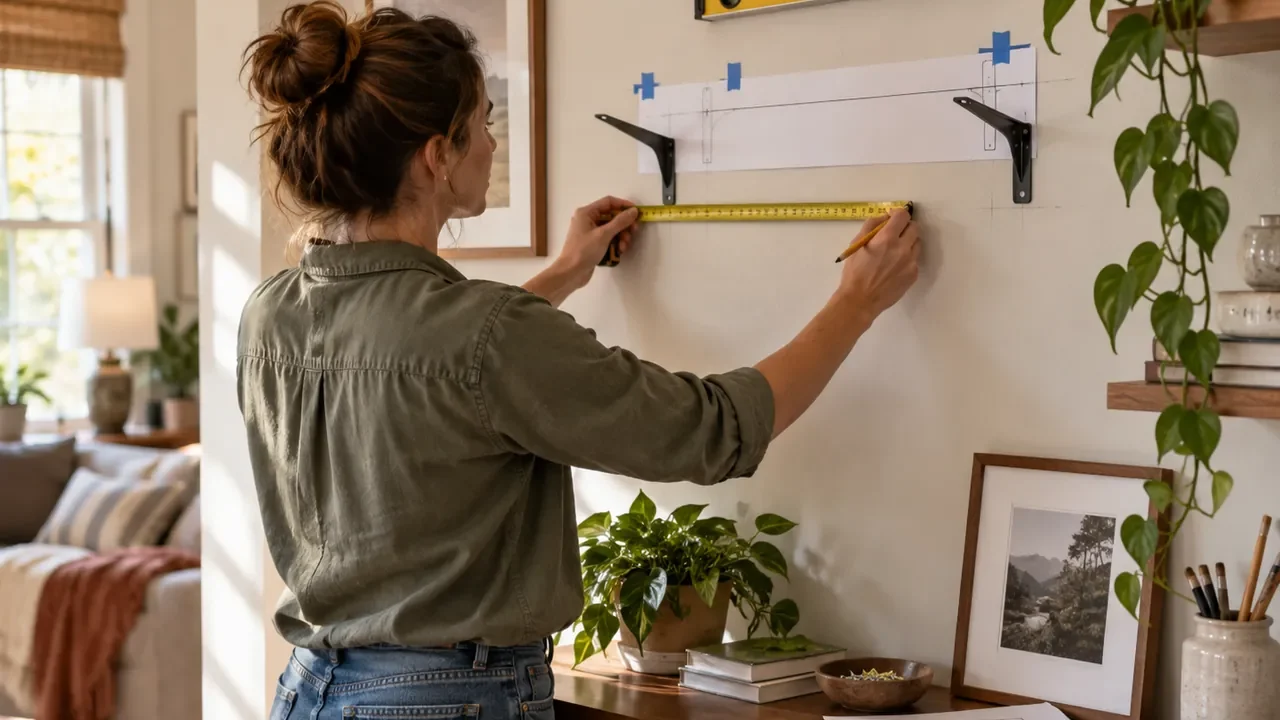
Test the height with painter’s tape
Mark the proposed shelf outline on the wall with removable tape and live with it for a day. Stand, sit, and walk past the area. This simple mockup often reveals that a shelf is too high, too low, or visually crowded.
Plan vertical spacing around the objects
Measure the tallest items you expect to store and add comfortable clearance to lift them in and out. If shelves are adjustable, decide whether flexibility is more useful than a tightly optimized layout.
Find out what the wall is made of
Drywall over studs, masonry, plaster, and other wall systems require different fastening methods. Use appropriate detection methods and avoid drilling where electrical wiring, plumbing, or other concealed services may be present.
Follow the shelf system’s support spacing
Long shelves can sag when brackets are too far apart or the shelf material is too thin for the load. Use the manufacturer’s bracket spacing and weight guidance rather than judging only by appearance.
Think about the edge and head clearance
Shelves in hallways, above desks, beside beds, or near seating can create bump hazards if they project into normal movement. Rounded edges, appropriate height, and conservative depth can make the installation easier to live with.
Center for the room, not always the wall
A shelf may look better aligned with a desk, sofa, cabinet, or artwork grouping than mathematically centered on the entire wall. Use the furniture and functional zone as your reference point.
Dry-layout the objects before finalizing
Place the intended items on a table in roughly the same width as the shelf. This helps you confirm whether the shelf is long enough and whether you actually need one shelf or several smaller ones.
Quick checklist
- Define the shelf’s purpose and expected load.
- Measure door, window, switch, outlet, and furniture clearances.
- Mock up the shelf outline with removable tape.
- Identify the wall construction and concealed-service risks.
- Use hardware and bracket spacing rated for the shelf and load.
Common questions
Can drywall anchors hold a shelf?
Some anchors are rated for specific loads and wall conditions, but capacity depends on the exact anchor, wall material, installation quality, bracket design, and load direction. Follow the hardware manufacturer’s ratings and use structural support where required.
How high should a wall shelf be?
There is no universal height. It should suit the room, the items being stored, and safe access. Mocking up the height with tape is often more useful than following a single decorative rule.
Know the limit of a weekend DIY job
A small project should stay small. If the work exposes wiring, plumbing, suspected hazardous materials, structural components, or damage that keeps returning, pause before covering it with a cosmetic repair. Local codes, permits, and manufacturer instructions may also affect what can safely be done by a homeowner.
Protect finished surfaces, use tools for their intended purpose, and plan cleanup before starting. A project that can be completed neatly and safely is usually a better result than pushing ahead simply because the materials have already been purchased.
Bottom line
Good shelf placement is a small design project: define the load, study the wall, check clearances, and mock up the layout before drilling. That planning takes a few minutes and can prevent awkward heights, blocked doors, overloaded hardware, and a wall full of avoidable holes.